Saturday, June 29, 2019

NOTRE DAME RECAP - PART 2


A second Recap post, hopefully bringing us up to date. Here I am talking about where we were 3 or 4 weeks ago. 


Around this time, Alfredo was working out his approach to modelling the complex arrangement of vaults around the curve of the apse at the East end of Notre Dame.  That was quite a challenge and generated a lot of discussion, especially the vaulting of the triangular sections which result in a kind of zig-zag arrangement. 


In the last post I mentioned our exploration of models on Sketchfab related to Notre Dame. More power to everyone who has had a go, whatever the software used or the reason for taking on the challenge. I’m sure you all learnt a lot along the way, and nothing said below should be taken as criticism. They are all worthy attempts in my view.

However, it does seem to me that mesh models tend to focus the mind on surface detail, and don’t lead to the kind of structural questioning that a BIM approach stimulates. 


Common mistakes include 1) failing to notice that the Triforium galleries turn the corner at the Transepts, and 2) over-simplifying the rhythm of buttresses and window bays around the curve of the apse. In my view the simple fact of flipping between a 3d window and plan/section views (complete with grids and dimensions) makes a BIM approach much more likely to reveal subtleties of design such as the two I mentioned above. BIM forces you to think more carefully about how a building is built, how walls line up on successive stories, where staircases lead, etc.


There are some interesting models on Sketchfab, and I have found the ones based on photogrammetry especially useful. I got a bit carried away taking screenshots for future reference. It’s useful to flip through these, but nothing beats orbiting around the source model.  Important also to find a balance between active modelling and close study of the reference material.


So back to modelling. I noticed that the round columns were displaying inconsistently, and some had a wide slot cut out of one side.  They were nested inside arch families and “join geometry” was causing problems. Ultimately, I am inclined to dispense with nested columns completely and place individual columns directly. Sometimes you can try to be too clever for your own good.  Notice how some of the columns are displaying as if viewed from above, rather than sliced by the cut-plane.


I decided to tackle the four columns at the corners of the crossing. For some reason the East walls of the transepts are treated rather differently from the West Side. The two columns on the West Side are treated simply with flat faces, while the two to the East are expressed as bundles of ribs. Is this just a whim? Does it express the richness of the chancel in contrast to the nave, where the common people sit?  I know not, but they are interesting questions.


A lot of fine tuning and elaboration needed down the line, but my current focus is looking for misconceptions and anomalies, places where “first pass” modelling is still required.  Ideally, we want to keep everything at the same level of development and resolve issues that arise before jumping ahead to add more levels of detail.  It certainly would help to have access to a point cloud. 


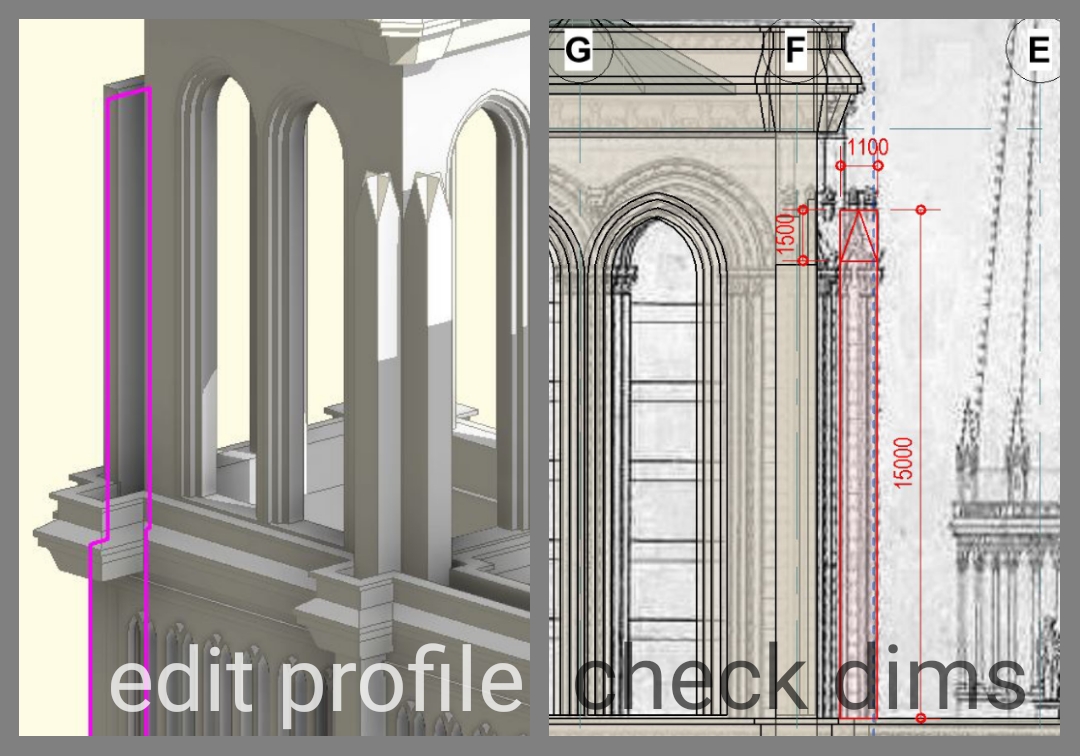
Next, I set about adjusting the Triforium arch down the sides of the nave.  I placed a jpeg behind a semi-transparent section view to act as a guide while I adjusted the proportions. It won’t be the last time I revisit this family, but I’m comfortable with the progress made on this occasion.  Just need to do a similar exercise for the smaller arches around the chancel.


Back to the round columns again, and I realised that there are several different versions, even before you get to the variations in capital style. So I tackled two of these, one with big bumps on the side, the other a tight bundle of ribs. The 4 bumps version is a one off close to the West End, adjacent to the nave.


The ribbed version occurs alternately between the two aisles. Again, I’m comfortable with the progress made in this area for the moment. Maybe next on the list will be side chapels, which are extremely bare at the moment.  But meanwhile, exchanges with Daniel and Marcel set me off upgrading the Site Context link. 


Marcel picked up some 3d geometry from a site called… and after some discussion and experiment we found that by bringing it into Revit via Sketchup we obtained an explodable object that became a series of solids, so that we could delete the crude representation of the cathedral itself.

What we have now is a combination of those solids, some of the Revit geometry I had created previously to represent the river, and a bit of extra modelling in Revit to plug some gaps. 


More recently I spent a weekend tackling the end walls of the Transepts. These are remarkably complex compositions with all kinds of passages, spiral stairs and access galleries that I am still struggling to understand. But once again it feels good to make some significant progress, even though I know there is a long way yet to go.

Since then Alfredo has contributed a detailed model of the Rose window. 


This project is a voyage of discovery.  It’s all about learning, digging deep, striving to understand.  Collaborative BIM is a wonderful tool for exploring history, how things work, why buildings are designed the way they are.

Early on, we discovered that the triforium galleries “turn the corner” at the transepts… something that many other models have missed.  But another surprise was lurking.  One of these returns pops up in the corner.  Why?  Maybe it’s just a way of introducing a taller window at the end.  I suspect it is one of the novelties introduced by Viollet le Duc.  BIM helps us to ask penetrating questions and we have much still to learn.


Wednesday, June 26, 2019

REWINDING NOTRE DAME


This is a “throwback” post, half-prepared a month ago, but never finished.


Why doing this in BIM? It’s a different question depending where you put the emphasis. WHY.  … Speaks to motivation. I started this model on a whim, out of curiosity, as a personal research project, pursuing my interest in “how buildings work”.   Having spent a good 4 years focusing on the Bank of England and the classical styles that dominated western architecture for some 400 years perhaps it was time to turn my attention to the Gothic mode which preceded Classicism and resurfaced for a while in the 19th century as a kind of disruption on the way to modernism.


So the “WHY” has to do with research, using BIM to explore the role of buildings in human history.


DOING … puts the emphasis on activity, tools, processes.  We learn by doing.  This is collaborative work.  We are interacting with each other in an active way, trying out different tools and sharing the results via Social Media.  Daniel suggested using BIMtrack for team collaboration.  This seems to have a lot of potential, but has yet to take off in practice with our particular team.  I like the mobile app, and I do think that touch devices that we carry around in our pockets will be increasingly important as BIM becomes democratized and accessible to everyone involved in the world of buildings (design, construction, maintenance, use, appreciation)

BIM360 it at the heart of our work.  That’s where model lives.


THIS … is Notre Dame, chosen because of a topical event as well as a switch in focus to the Medieval period.  To construct a model we need source material, text and images for the most part, but some 3d files also.  We are storing these in BIM360, to keep everything in one place.  Personally I am a little disappointed in the image handling.  For Project Soane I shared images via Box, which syncs automatically to my hard drives, so that I can reorganize and browse with the ease and responsiveness of local access, drag and drop moving, flipping through images rapidly, etc.  We do have the Desktop Connector, but this doesn’t quite work as smoothly as Box, Dropbox, One-Drive etc.  I think this derives from viewing BIM as a documentation tool, focusing on standard “building project workflows”.  Historical research has slightly different demands and benefits from a more fluid approach to managing and sharing reference material such as images.


BIM… “all things to all people?”  … an acronym that covers a multitude of sins?  For me it’s just a convenient label for the impact of “DIGITAL” on the world of “BUILDING”.  So why is that especially relevant to historical studies?  


I think it’s a neglected approach and very powerful, a way of pulling together many disparate strands and integrating them into a unified field of study (the research equivalent of a Common Data Environment?)  So for example team members came across mesh models online of Notre Dame statuary, and via Slack conducted an exploration of how to integrate these into the model.  


I’ve posted about the “edge hiding” capabilities of 3dMax before.  It’s a bit of a clunky process that requires a low poly file which can result in an unduly spiky, triangulated form.  In the case of the woodchopper (from one of the entrance portals) I got around this by manually deleting areas of dense detail in unimportant areas, until the decimation process yielded a more useable result.

This was an interesting learning experience, but didn’t solve the issue of holes in the mesh.  


A similar exercise on the figure of Christ from the central pillar of one of the portals had similar shortcomings.  Perhaps we could patch up the holes, either in MAX or directly in a Revit family, but for the moment I decided to move on.  


The most promising result was from the central pillar of another portal: the Madonna and child with a fair amount of adjacent sculptural detail.  We also discussed the use of decals and experimented with the possibility of applying this approach to the elaborately carved concentric ribs of the arches over these portals.  If only we could embed these decals inside families.  This led me to thinking about the new Enscape assets.  Clearly these are mapping bitmap images to low-poly mesh models resulting in very convincing objects when viewed in Enscape that are also recognizable when viewed in Revit’s shaded mode.


So I took a little detour, getting my Enscape license renewed (thanks guys) and exploring the Assets currently available (very impressive) and assembling some of them into a carefully composed perspective.  That was fun, but at the back of my mind lies the possibility of using the Enscape3d assets technology (or for that matter the similar Archvision RPC approach) to create custom families that can be used for sculptural detail that is lightweight when used in shaded revit views, but appears richly modeled when rendered.  


Surely we are going to need something like this as the Notre Dame model progresses.


Back to BIMtrack briefly and looking at the PC interface for a while.  Again I was favourably impressed by the interface and capabilities, but the sad truth is that we haven’t done anything with it yet. The truth is that for the moment most of our communication is taking place on Slack, and that’s working very well.


Sunday, June 23, 2019

NOTRE DAME - INCREMENTAL PROGRESS


I’ve been so busy with my day job, that my usual write-ups of Notre Dame have fallen behind.  So I’m going to fast forward to more recent work. 


I have embarked on a second pass of the bell towers: starting with my first tentative roughing out and taking it to the next level. This involves a lot of estimation and intelligent guesswork.  We don’t have access to a point cloud or to measured drawings.  Personally I find this a good thing.  The experience is enjoyable, a game of discovery, and I am honing important skills, that tend to be neglected in the BIM world: judging proportions by eye, “winging it”, taking imaginative leaps into the unknown.


These are the kinds of skills you employ when sketching from life, or engaging in the early stages of design.  You have to trust your instincts, make bold decisions, employ simplifying assumptions. And it’s a physical process, training hand, eye and brain to work together fluently.  This was unavoidable when we drew by hand, but sadly neglected in digital workflows.  It need not be so.  After all, the touch interface of smartphones has taken us sharply back into intuitive, directly physical “ways of thinking”.  I long for the day when drawing with a stylus will be an integral part of BIM processes, as respectable as “computational design” or “reality capture”.


The towers are rectangular with two buttresses at each corner. During the first pass these were represented by tall wall segments, edited in profile to capture the gradual stepping-back towards the top.  Essentially there are four apparent storeys, the top one carrying the bells.  I decided to gradually chop layers off the existing buttresses using the edit-profile feature, and substitute loadable families.

First of all a bit of sketching over the west elevation to generate dimensions.  Then use these to build a wall-hosted architectural column. Quite simple at first but it needs an offset from the wall to create space for an in-place extrusion that defines an octagonal extension to each corner. 


I’m agonizing over the fact that the towers are not square.  Doesn’t seem to match the photos.  But it seems unavoidable that the sides of the rectangle at ground floor level are significantly unequal.  Maybe there’s a way to make the adjustment on the way up.  But for the moment I focus on keeping things centred.


The two towers are instances of a group, but the mouldings that wrap around the whole West Front are modelled outside the group for the sake of continuity. The upper one of these two sweeps is an open skywalk that was packed with tourists before the fire. Was this area always open to the general public? Or was it part of the extensive network of maintenance access that we are just starting to understand.


It’s very satisfying to see this project becoming a genuine team exercise.  Since I was last in the model, Marcel has been busy, first of all mapping out the timber trusses above the stone vaults.  You can also see Paul Aubin’s work on the flying buttresses here.  Most of you will be aware of Alfredo’s modelling of the vaults around the apse, and you may have seen his Rose Window.  Can’t wait for that to show up in the model.


Between those two sweeps, a transparent screen of slender columns runs around the building.  I had mimicked this with a family that simply pierces holes through the thickness of the wall.  That was OK as a “quick & dirty” placeholder, but the time has come to express the layered reality: a delicate screen defining a passage with a wall behind.  My approach here, as so often, is to start with a simple screen family that captures the scale and proportions required, then gradually increase the “Level of Detail” until it matches the current stage of development of the surrounding context. 


 The passage behind the screen is practical as an access system, but also introduces an interesting transparency, a change in texture defined by a filigree with a shadow behind.  The wall at the back has windows of different shapes, much more to figure out about these, but we’re making progress.  One thing I like about using a BIM approach is the way you are drawn into considering multiple factors that affect the form of a building: aesthetics, functional relationships, structural alignments, the practicalities of construction.


This layered colonnade, echoes the row of statues running across the façade lower down.  Here again we have deep shadow, a repetitive rhythm and an overall horizontal emphasis.  The other thing that strikes me is how deceptive the scale of the building is.  You need to keep looking at the tiny human figures on the skywalk to remind yourself how huge the structure actually is.  At the moment the interior of the bell towers looks very empty.  In reality there is a network of timbers supporting the bells and the wheels on which they are mounted.


The model has reached a stage where it is really interesting to adjust the section box and assess what is revealed about the relationships between spaces, structural elements, aesthetic balance, daylighting etc.  In parallel with this we keep stumbling across additional reference material which gets uploaded to BIM360.  It’s a collective exercise and we often have discussions on Slack about historical details that pop up: Victor Hugo, Viollet le Duc, Crockets, 


We are using Revit 2020 which has the long awaited “free perspective view”.  It seems that “old habits die hard”, and I haven’t been using this feature.  A screenshot doesn’t do it justice of course.  We’ve been able to do camera views “forever”.  The extra value comes from being able to “uncrop” the view and move around freely, to get inside the model in a way that isn’t possible with a parallel projection.


I guess the fact that I have Enscape also makes it less important for me to use free-perspective in a Revit shaded view, because I can do it with all the added richness of a real-time render.  On the other hand, the shaded view directs my attention towards modelling issues, wall joins etc. in a way that a rendered view doesn’t.  So, I must make the effort to switch my default 3d into perspective mode more often.


Let’s finish off with a couple of shots from Enscape.  There is an access route running all along the eaves, corbelled out from the wall.  Just starting to show this, in simplified form.  I like the shot of the skywalk looking back over the ridge, with Marcel’s first pass of the Spire in the background.  This is quite misleading though because the tall narrow “windows” are missing the metal louvres/baffles that would block out that splendid sunburst effect.  A bit of poetic license is allowable in my view.


And finally the roof, from above and from inside.  We are making steady progress.  Our model doesn’t have the richness of detail of some “mesh-based” models out there, but there are advantages to taking a BIM approach.  You are forced to think about how the building is built, how it functions, where the staircases go and how the doors connect into real spaces.  It’s exciting to add layers of detail, to gradually enrich the model, but for me the questions we ask along the way are probably more important than the “wow” images we can sometimes generate.  That’s it for now.  More to follow.