I don't know much about Aarhus. Didn't know anything until it was announced as the next venue at the conclusion of RTC Europe in Porto. I won some free accommodation in a not-very-serious quiz at the end of the Building Content Summit (if they remember) which has enticed me into submitting a couple of abstracts. More to the point, I really enjoyed the atmosphere at my first European version of the event and made some good friends. No longer RTC of course, this will be the first BiLT Europe, rebranding to reflect a broadening audience, with a somewhat improved logo.

Arhus means "River Mouth" apparently and the town has Viking origins. Turns out to be Denmark's second largest city, with Scandinavia's largest University and a massive container port. I'm looking forward to drinking in some Scandinavian atmosphere, assuming it works out. Perhaps I will manage a day or two in Copenhagen also, some buildings there I would love to see. And of course every culture has its own quirks in terms of building techniques and styles: the way these have been expressed over the years. Always inspiring to visit a new city with a few hundred years of cultural history behind it.

Conferences give me a motivation to explore something more thoroughly and in more depth than I might otherwise do, and I usually try to do something significantly different each time. Over the past year or so I have had some interesting challenges using Revit's Curtain Wall tool, and I realise that I would like to undertake a more systematic review of its capabilities and quirks.

Overlaying an element of randomness onto a regular grid is a simple but effective architectural maneuver, with obvious relevance to the Curtain Wall tool. I've really enjoyed trying out different approaches to this, and look forward to sharing my experiences. Nothing fancy, just basic Family Editor stuff with a sprinkling of lateral thinking.

Revisiting a project to prepare a presentation usually throws up new ideas.
You wouldn't expect to use curtain walls on Project Soane, but there are many internal areas where he used a finish that imitates stone courses with recessed joints, so I've been experimenting with curtain panels that mimic various tiling patterns. Fill patterns with matching render appearances are all very well, but sometimes you want to express the 3 dimensionality of the joints in shaded views.

I've had several goes at the Mushrabiya Screen in the past, with varying degrees of success. Last week I put a couple of ideas together with a slightly different twist. The result is a very flexible modular system for generating new scalable patterns, rapidly and reliably. It's my best attempt so far, and subject to further development over the next few months.

I worked on a project last year which is just coming back to life again. Not going to reveal any specific details, but it involves insulated panel walls that slope and curve. All this is half-hidden behind a slatted screen which is not yet modelled, our scope is the interior fit-out, so I've been modelling someone else's design as context for ours. It was an interesting challenge and I'll be sharing my solution for what it's worth. Something of a hybrid, but it does the job.

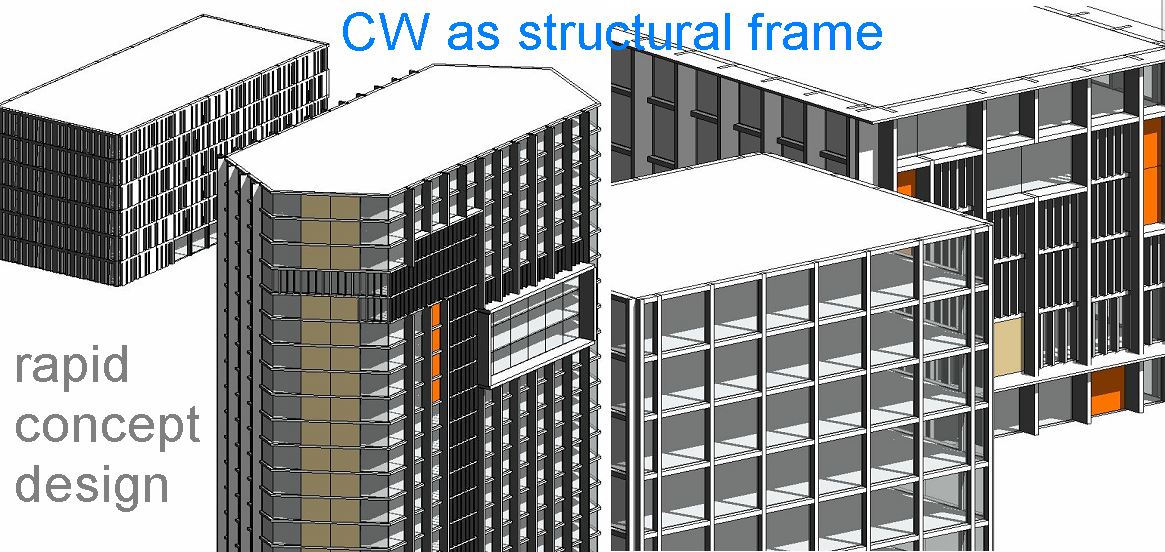
I've also been giving some support to teams doing concept designs for residential developments. My contribution has mostly been to develop families that facilitate rapid mocking-up of external façade ideas. One of the techniques I am playing with involves using the curtain wall tool to model both structural frame and infill treatments. It shows some potential, at early concept stage, when things are still very fluid.

I've also done some work, at the request of another colleague, on ways to model junctions of mullions with shaped sections that give better close-up results than the
default "square cut-off". Again, it's early days and I will be exploring this further before venturing towards the land of the Vikings.

And to conclude this post, I have also been exploring the use of curtain walls to represent timber panelling. Not so sure about this one. I think it will only really pay off where there is a lot of regularity and repetition. Shaping and cutting around doorways, windows, fireplaces etc. is a bit of a nightmare. Still it's an interesting challenge to stretch the capabilities of the tool.

My second abstract also involves an in-depth study of a particular Revit category: Planting. But that will be another post.

Arhus means "River Mouth" apparently and the town has Viking origins. Turns out to be Denmark's second largest city, with Scandinavia's largest University and a massive container port. I'm looking forward to drinking in some Scandinavian atmosphere, assuming it works out. Perhaps I will manage a day or two in Copenhagen also, some buildings there I would love to see. And of course every culture has its own quirks in terms of building techniques and styles: the way these have been expressed over the years. Always inspiring to visit a new city with a few hundred years of cultural history behind it.

Conferences give me a motivation to explore something more thoroughly and in more depth than I might otherwise do, and I usually try to do something significantly different each time. Over the past year or so I have had some interesting challenges using Revit's Curtain Wall tool, and I realise that I would like to undertake a more systematic review of its capabilities and quirks.

Overlaying an element of randomness onto a regular grid is a simple but effective architectural maneuver, with obvious relevance to the Curtain Wall tool. I've really enjoyed trying out different approaches to this, and look forward to sharing my experiences. Nothing fancy, just basic Family Editor stuff with a sprinkling of lateral thinking.

Revisiting a project to prepare a presentation usually throws up new ideas.
You wouldn't expect to use curtain walls on Project Soane, but there are many internal areas where he used a finish that imitates stone courses with recessed joints, so I've been experimenting with curtain panels that mimic various tiling patterns. Fill patterns with matching render appearances are all very well, but sometimes you want to express the 3 dimensionality of the joints in shaded views.

I've had several goes at the Mushrabiya Screen in the past, with varying degrees of success. Last week I put a couple of ideas together with a slightly different twist. The result is a very flexible modular system for generating new scalable patterns, rapidly and reliably. It's my best attempt so far, and subject to further development over the next few months.

I worked on a project last year which is just coming back to life again. Not going to reveal any specific details, but it involves insulated panel walls that slope and curve. All this is half-hidden behind a slatted screen which is not yet modelled, our scope is the interior fit-out, so I've been modelling someone else's design as context for ours. It was an interesting challenge and I'll be sharing my solution for what it's worth. Something of a hybrid, but it does the job.

I've also been giving some support to teams doing concept designs for residential developments. My contribution has mostly been to develop families that facilitate rapid mocking-up of external façade ideas. One of the techniques I am playing with involves using the curtain wall tool to model both structural frame and infill treatments. It shows some potential, at early concept stage, when things are still very fluid.
I've also done some work, at the request of another colleague, on ways to model junctions of mullions with shaped sections that give better close-up results than the
default "square cut-off". Again, it's early days and I will be exploring this further before venturing towards the land of the Vikings.

And to conclude this post, I have also been exploring the use of curtain walls to represent timber panelling. Not so sure about this one. I think it will only really pay off where there is a lot of regularity and repetition. Shaping and cutting around doorways, windows, fireplaces etc. is a bit of a nightmare. Still it's an interesting challenge to stretch the capabilities of the tool.

My second abstract also involves an in-depth study of a particular Revit category: Planting. But that will be another post.


