Showing posts with label Excel. Show all posts

Tuesday, March 31, 2020

WEB WEAVING - RE-LIVING 2012


Second pass at the Revit -Excel-Revit workflow that I had picked up at my first Revit Technology Conference. 


This is quite a funky post really… Starts with a step-by-step “how to do it” then inserts an image that combines digital drawing with a bit of photoshop colouring.  I must have been very optimistic about the Wacom Inkling at that stage I think (August 2012) Sadly it didn’t catch on really.


Then I inserted a GIF.  Which was quite a bold move for me at the time.  I think I should try to do more GIFs really, (not to mention YouTube clips) 


https://grevity.blogspot.com/2012/08/excel-yourself.html


The next post is more of the same really.  Seemed very exciting at the time, but my interest in clever jiggery pokery has declined I think.  Technical tricks are not an end in themselves for me.  I want to just have a tool that I get very familiar with, then focus my attention on what I want to achieve without much thought about technique.  That should be handled at a subconscious level.  Like riding a bicycle or swimming perhaps.  You want to have a good technique, but you don’t want to be thinking about it all the time
.

And another GIF in there.  My fad for late 2012.


https://grevity.blogspot.com/2012/08/slipping-sliding.html


I like the next one.  One of my earliest attempts to capture the feel of organic building materials. Parametric “not quite circular” huts, featuring wiggly poles.


I really should come back to this and see how far I can take it.  In many ways it showcases the difference between a “way we build” study and a commercial building project.  Not much demand for representing this kind of technology in “day job BIM” … but if you are interested in exploring and discussing vernacular building styles around the world … that’s when the “BIM pencil” approach comes into its own.


https://grevity.blogspot.com/2012/08/still-on-excel-theme-but-taking-new.html


And back to the random Revit-Excel-Revit explorations.  Various different curtain panel families, devised to showcase a variety of possible effects.  I think this kind of work has been overtaken by the abilities of dynamoBIM with many reviteers around the world acquiring the ability to control complex façade designs in a controlled way.


https://grevity.blogspot.com/2012/08/square-dance.html


I think I must have seen a design for an art work and decided that this would be a good candidate for another randomising study.  So this is now a customised Generic Model with a nested array of rectangular elements.  


Another GIF in there as well. 


https://grevity.blogspot.com/2012/08/organ-grinder.html


I’d forgotten about the next one.  The Building Design Suite has been with us for a long time.  This was a weekend spent trying to persuade myself to get more value from the other software in that package.  Looking back almost 8 years later, very little of that actually panned out for me.  That’s an interesting expression, “panned out” does that come from Gold panning? How does our brain figure out the meaning of terms like that?  Doesn’t seem to require understanding the derivation. 


The comments on 3dMax trees and Showcase as a viewer are fascinating.  A deeply felt need that was finally fulfilled by Enscape3d, several frustrating years later.  And the Navis timeline feature.  I really thought I would find time to use that in my “Way We Build” work to animate simple bricklaying processes that I used in my 20s on building sites. 


https://grevity.blogspot.com/2012/08/sweet-talk.html


Aha!  This one was inspired by a post by Zach Kron on his Buildz blog.  What an inspiration that was for so many people (the blog).  He made a version of the Pantheon coffer dome using Revit 2010.  I think that was the first incarnation of “Point World”.  My post was done about 3 years after Zach’s though.


https://grevity.blogspot.com/2012/09/cough-cough.html


And another follow-up to Zach’s work.  I think I must have been making a conscious effort to go back to stuff that had gone way over my head at the time.  The spiky slug with random height pyramids was just one of those things that came together instinctively and proved exceptionally “photogenic.”  I’m still quite proud of that.  


The images produced by combining renders with shaded views in Photoshop had become standard fare for me.  I could rattle those off in no time.  Somewhat overtaken by slightly different processing methods using Enscape3d renders as a source.  I still like to soften renders and use my subconscious judgement to capture the mood I want.  Not always, but quite often. 


https://grevity.blogspot.com/2012/09/slug-it-out_6.html


Which takes us to another theme that gripped me for a while.  Musharabiya screens in Point World.  Quite a fertile area.  Somewhat labour intensive creating the curtain panel families but once made, adaptable to many different shapes of surface. 


https://grevity.blogspot.com/2012/09/screen-dump.html


I have a folder on my hard drive somewhere (actually I know exactly where it is and it syncs to the cloud so has something approaching eternal life) that is full of Islamic patterns.  Not all of these work well with “Curtain Panel by Pattern” but I spent a few weekends plodding through a few that caught my fancy … mostly fairly simple. 


https://grevity.blogspot.com/2012/09/patternising-with-natives.html


It’s interesting to note that all these tessellation exercises began with an analysis using 2d drafting in Revit.  That was a way of understanding the essence of the pattern, and deriving the Normalised Curve Parameters necessary to make it work in an adaptive setting. 


I’m pretty sure that the guys who came up with the conceptual massing environment (Point World) didn’t anticipate it being used for musharabiya patterns, maybe I’m wrong.  I have made use of this in my day job, several times.  Always a bonus.


https://grevity.blogspot.com/2012/09/more-web-weaving.html


And back to the Wacom Inkling.  This could be one of the best examples of putting it to use, and a rare example of putting the cartooning skills of my use to work again.  


I was trying to make the point that it’s easy to criticise the work of others from your “virtual armchair”  I’ve never been an out-and-out Autodesk fan-boy, but the factory basing mentality always rings hollow to me.  I really should do more sketching in this mode, now that I have Sketchbook Pro on phone and tablet.  (Note to ageing self)


https://grevity.blogspot.com/2012/09/factory-bashing.html


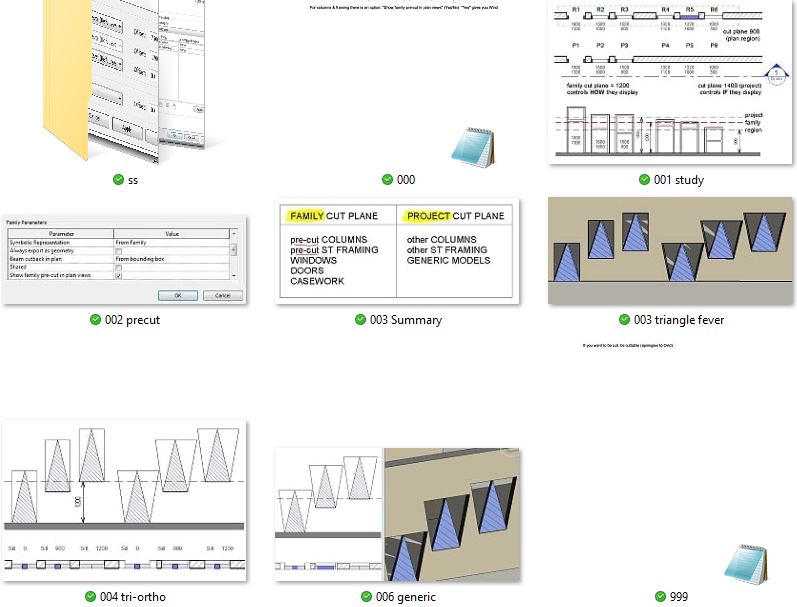
And here comes a rarity.    A deep dive into sparsely documented Revit functionality.  How do cut planes within Family Editor interact with Project cut planes?  Depends on the family category of course and it took me a while to figure out.  Most of the time this stuff just works, but once in a while you have a situation where you need to know the rules of the game.


https://grevity.blogspot.com/2012/09/fanlight-fanny.html


So the last one in this series is a continuation of the same investigation.  It seems I had stumbled into an area where very few had knowingly trod before. 

Next recap post will cover my second pumpkin adventure, which seems so long ago now, but it sure was fun.


https://grevity.blogspot.com/2012/10/cut-cut-cut.html


Sunday, February 23, 2020

EXCELLENCE UNLEASHED


There are certain categories of Revit family which troubled me from day one.  The out-of-the-box content was useless, and making your own families for those categories was quite challenging.  One issue was to do with “organic shapes” (sanitary ware, certain types of furniture, etc.)  Doors present a different challenge. 

This post from May 2012 looks at some of the options available, and in particular the “Door Factory” plugin that was developed in New Zealand. (Something that many people feel should be built in to the installed version of Revit).  Ultimately I have developed my own system for generating a wide variety of door families in a systematic and predictable way.  This has been operating successfully at GAJ, where I work for several years now and has proved to be quite adaptable.  Will there ever be a universal, shared approach to creating door families in Revit? 


https://grevity.blogspot.com/2012/05/open-door-policy.html


Next comes a post about those pesky Plumbing Fixtures.  In this case, many of the families I created were quite straight forward, although the toilet bowls and urinals did involve subtle “organic” shapes.  That was an interesting project for me.  A chance to build up a library of content for public rest rooms.  That continues to be an ongoing project.  In fact I have been reorganizing the “collection” file on our server just this week. 

I am a big fan of organizing all the Revit families for a particular category in a Revit project, with views and sheets that help end users to understand how the families work and to find the content that they need for a particular project.


https://grevity.blogspot.com/2012/05/plumbing-blockage.html


One thing I have discovered that if you name a blog post after a well known catch phrase, a pop song, or whatever … the spam will find a way past the robot checker.  Windows from Kerala etc advertised in my comments section … the internet at its worst. (no reflection on Kerala, I have several good friends who hail from that state)  I was working on roads that wind around a hillside and trying to speed up the process of cutting into Revit topography with pads, simulating sloping faces and building objects to represent roads (Point World inevitably)


https://grevity.blogspot.com/2012/05/highway-to-hell.html


One answer to the spam issue is to miss-spell words, introducing an element of double-entendre in the process. This work was part of an effort by our office to get the civil engineers to be a bit more creative in their approach.  BIM is supposed to be a tool for interdisciplinary coordination, although the usual narrative is not quite so combative, but then again, the usual narrative assumes that the engineers are using BIM.  Thankfully, almost 8 years later, many of them are.


https://grevity.blogspot.com/2012/06/route-66.html


The next post coincides with my first RTC event.  I was just an attendee. Since then I have always gone as a speaker.  These are reflections on the US and cultural differences.  I have lived in England, Zimbabwe and Dubai.  Standards are good in many ways, but cultural variation is also fascinating and the creativity with which people design devices for simple bodily interactions like switching on a table lamp or controlling the flow of water … I really enjoy the surprise of finding that these work in a different way from past experience.  My search for an effective digital drawing tool had lighted upon the bamboo, which really draws on paper in the normal way while simultaneously recording digital image files. Didn’t really catch on.


https://grevity.blogspot.com/2012/06/comparative-anatomy.html


The conference was in Atlanta but I stayed with my daughter before and after, in New Jersey which has a town called Millburn, like my surname but with an extra “L”.  Travelling is always invigorating.  Everything is slightly unfamiliar, constantly noticing things that you wouldn’t normally think about.


https://grevity.blogspot.com/2012/06/georgia-on-my-mind.html


Passing through England on the way home.  I went to see Richard Arkwright’s first spinning mill in Derbyshire. This was early on in my deep dive into the industrial revolution by looking at buildings and how they were built.  This factory takes us back to just before fossil fuels became our main source of power.  Arkwright used water power as a bridge while steam engines were ramping up their efficiency, until eventually he ran out of streams.  St Pancras station provides a perfect link.  This terminus was a gateway into London for people from Derbyshire once the chain reaction unleashed by Arkwright’s factory progressed to steam powered public transport.  The magnificent single gothic arches of the roof were manufactured in Derbyshire, as was the beer that was stored under the platform in huge quantities. This warehouse has now been opened up to the arches in places to create a modern shopping mall.  Gothic Revival side-by-side with minimalist modernism.


https://grevity.blogspot.com/2012/07/second-back-at-work.html


Back in Dubai, I started implementing ideas that I had picked up at RTC (the forerunner of what are now the BiLT conferences)  I particular, I was using an “excel and back” workflow to randomize curtain panels.  This was quite exciting for a while.  I haven’t used the technique on actual fee earning jobs, so the novelty wore off after a while.  There was a free app that did the job for a while.  I guess these days you would probably use Dynamo, if you had the skills.


https://grevity.blogspot.com/2012/07/spreadsheet-power.html


I was creating imaginary facades.  Nothing very exciting from a design point of view.  Variable depth, holes of different sizes, colours randomly distributed.  I learnt some new stuff about Excel and was hopeful that it would become a regular bolt-on for handling Revit data.  Hasn’t materialized.  Is it me?  Would it make a difference if the connection to Excel was built into the core of Revit?  Who knows?


https://grevity.blogspot.com/2012/07/choose-your-poison.html


Last post in this sequence is something completely different.  Very much bread and butter problems that crop up in our office, mostly when doing “Gulf Traditional” style architecture.  We use cavity walls to generate the thickness needed to pull this style off effectively.  The problem comes when trying to join up the various wall types and to create deep recesses all over the façade.  Not sure I have developed a really satisfactory solution yet, but haven’t done a project like this for a couple of years now.


https://grevity.blogspot.com/2012/08/macavity-unmasked.html


Thursday, August 23, 2012

ORGAN GRINDER

These exercises just reminded me of organ pipes.  Then there is a secondary allusion to the  monkey that generates heart-rending melodies by the turn of a handle.  If Revit is the organ then Excel would be the grinder.


Start with a generic model.  I have a starter file that I often use as a springboard.  It's a rectangular extrusion with 5 parameters already set up.  Took just a couple of minutes to adjust this, make Height & Depth instance parameters, rename Thickness to "Base Offset" (also instance) , leave Width & Material as they are.  Thickness was a parameter with nothing to do in my seed family, so I had to draw a reference plane, stretch down the extrusion and lock it, place a dimension, assign it to Thickness (Renamed to Base Offset).  Done.


Load this family into another new generic model.  Create a whole series of parallel reference planes and use a parameter called "Spacing" to control just that.  Lock one instance of the nested family to each of these. Finally, link the type parameters to equivalents in the host family.  Now load into project.

You might want to try adjusting this family manually.  It will help to give a sense of how helpful the Excel link can be.

I am using Revit Excel Link (REL) from within Family Editor.  Once again my aim is to randomise the Instance Parameters.  REL will export these parameters to an excel sheet, then I set up formulas using the Randbetween function.  There are 3 columns and each of them is randomised separately.  The formulas for the 3 columns are very similar, but reference different fixed cell locations.  These fixed locations contain values that I can vary in order to fine tune the effect. 


I've used colour coding to make this clearer.  The Height is coded pink.  I am generating values that range between 1500 and 2200 in 100mm steps.  So the formula refers to 4 locations: a start value (1500) an increment (100) and limit values for the increment multiplier (1 & 7)  The Randbetween function generates random values between 1 & 7, multiplies these by 100 and adds the result to 1500.  


Load these values back into Revit check what it looks like, then adjust the start values and increments and reload.  It took me 3 or 4 iterations of this to get the right balance between height and base offset.  Just to be clear, you need 2 worksheets in Excel.  One is the export from Revit, the other is where the formulas reside. The columns are linked together so that the Randomly generated data will replace the original values imported from Revit.


Then it's all down to rolling the dice.  Take a look, see what that suggests: play with Revit a bit; roll the dice again. Here's a GIF to convey the impression of rolling dice.


Now for some variations that are pure Revit.  Let's see what happens if we tweak a few type parameters, vary the width and spacing for example.


Here's a version that I quite like.  Be prepared for some happy accidents. 


Oops, that wasn't quite what I intended, but it opens up another avenue for exploration.


Roll the dice again.  Maybe a different view will trigger off some ideas, or perhaps an interlude of self-indulgent image processing.  I deserve a break from all this formula stuff anyway. 


What if we stretch the spacing out really wide ?


And it's fun to play with materials.  For example reflective materials work much better when the slats are more like boxes.  Timber is good when they are tall and spiky.  I haven't even begun to contemplate metal sections painted in a range of primary colours.  That will have to be another post. Too much to think about.


Chrome is interesting though.  Better with a dark background.  Hardwood perhaps.  I need to put some stuff in the model to show in the reflections, which turn out to suffer from appropriately random distortions.  That's nice.  Had to put Florence in there to indicate that whimsy is coming into play.  She's my signal that you are entering pumkinland.  Remember to go into render properties of an RPC object and turn on Reflections.


I think the interesting part of all this is the flip-flop between Revit and Excel.  Decide on your parameters, some instance, some type.  Manipulate the instance parameters from Excel, adjust the type parameters within Revit.  Makes for an interesting game and generates a lot of different variations very quickly.


Thursday, August 16, 2012

SQUARE DANCE

I'm back on curtain walls again.  Sometimes you need to start walking away from an idea to get fresh inspiration.

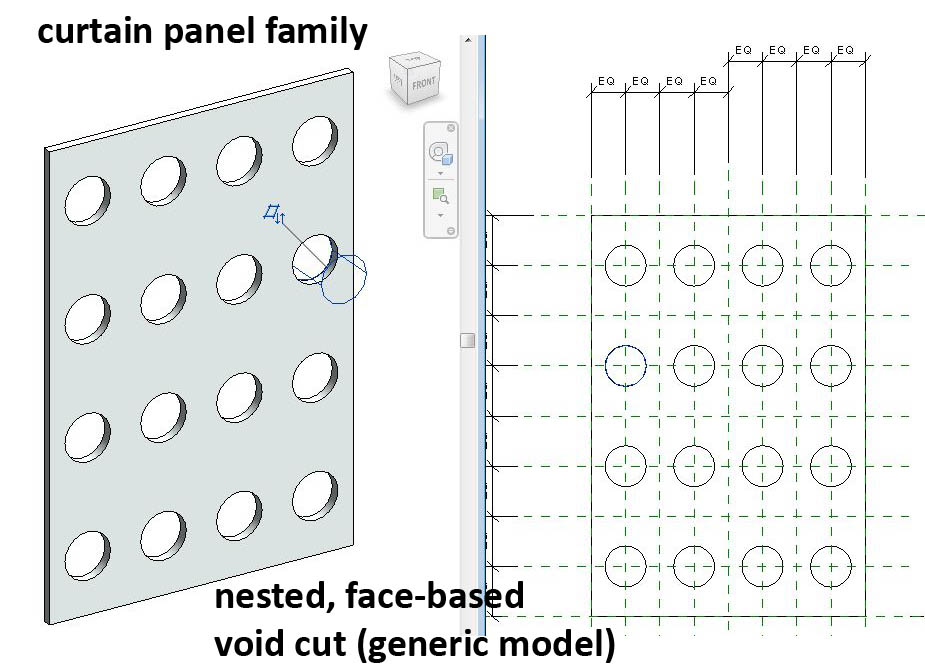
What about a curtain panel family with 16 equally spaced holes ?  I used the face-based generic model family template and made a void extrusion with a radius parameter.  Nest this into a curtain panel family and  link the radius to a matching parameter in the curtain panel,  Now we will be able to control the hole sizes from Excel.  It has to be an instance parameter, and I also made mine a shared parameter so it can appear in schedules.  The void families are all locked to reference planes that have equality constraints.


For my first 2 experiments I am going to use the random function.  This makes life easier, because I actually don't need to know exactly where each panel is.  I can leave my Excell file as a vertical column and just apply a formula to randomise the values.  In this case I wanted 6 different hole sizes and to step up the size by the same interval each time.  The formula is quite simple, and flexible too.  I can change the number of different panels by changing one of the two fixed cells which are referenced.  Notice the use of the dollar symbol to indicate a fixed reference rather than a relative link.


If I had been a bit more careful, I could have put the value "40"  into a fixed reference cell also.  Then I would be able to easily vary the amount by which the radius of the hole is successively increased.  How carefully you set up the formula has a big influence on the ease with which you can explore different design iterations.


It's easy to make a schedule that displays the hole size and number of instances for each panel "type" (They are not types in the Revit sense of the word)  You can also use a schedule to select a group of panels, right click and "show".  Cycle through avaiable views, use temporary isolation if you like, and change the material of a group of panels based on hole size.


The second experiment doesn't require any more work in excel.  I just want to change the shape of the holes.  I copied the generic model void family with a different name so I can keep both versions in my curtain panel family.  Then I just select all instances and swop between the families.  They will remain locked to the reference planes, but you need to repeat the parameter linking.

Load it back in and we get the same random effect, but with square holes.  I didn't change the name of the curtain panel family because that would have messed up all the instance values for the hole sizes.


That's enough randomising.  What about a diagonal gradient ?  The curtain panel is based on one that I did for my first Excel post, so it already has X & Y values.  These are just text fields (instance parameters) that allow me to identify the position of each panel in the horizontal and vertical grid. 

It's a bit tedious, but once done gives  you much more control.  Select the first vertical row and label it A, do this ten times using B, C, D etc.  Now select horizontal lines and label them 1 to 10.  By using separate parameters we only needed to make 20 selections to label 100 panels. 


Now export to excel.  You need to do a custom sort on the data.  This requires unprotecting the worksheet. (Review tab)  You will need a password.  You can set this during the process of exporting to excel.  Select all the data (blue and white), but not the grey headings.  Do a two level sort: first alphabetic on the X values, then numeric on the  Y values.  The data is now organised in blocks of ten that match the vertical rows of the curtain wall. 

Now we set up a rectangular array in another worksheet and link the columns to the equivalent blocks in our vertical data stream.  If you want to use Excel with Revit, you need to practice your linking skills.  Set up the first link in the top left corner.  Must be relative.  Then propagate it down to all 10 cells in the A column.  Now do the same thing for B, etc.  Maybe some excel genius can come up with a macro that automates this process. 


You will also need to hone your formula writing abilities.  Once again, I set out to place key values as fixed references.  This one works, but I end up with a lot of different panel types which may not be cost effective.  I case you are worried that the diagonal gradtient is reversed in the rendering, it's simple, we are viewing the wall from the other side.


Some adjustments in excel reduce the number of different panel types.


But the visual effect of a continuous gradient is not really affected.


The next experiment returned to random patterns but using a panel based on a blend. 


Within the Revit family I set up simple formulae to tie the positon, & size of the top rectangle to the same parameter controlling the depth of projection.  This is a second iteration which swops in two extrusions in place of the single blend.


Which works better as a random pattern.


Once again I have just 6 different panel variations and I can use a schedule to select them and apply materials.  Remember these are not true Revit types.  We are using instance parameters throughout for the Revit Excel Link method to work. 


So we have a range of techniques for generating variety, based on Excel linking, use of family editore & selecting panels via schedules.


Here is a version of the squares using the gradient formula in excel.  It gives quite a subtle effect


Finally back to the blend.  This time using the gradient effect, and introducing a void sweep around the top edge.  This has an interesting and unanticipated effect. 


As the angle of the pyramids becomes shallower towards the top left corner, the shelf created by this void sweep becomes much broader very rapidly.