Pressed metal frames are common in Southern Africa. Simple, robust and built-in as the brickwork proceeds. I created a “frame-only” family, added a plank with a nail at the top to hook over the frame and bricks to weight the base. These hold the frames vertical while you plumb it up, and as you build it in to the wall. These are not the kinds of families you would make as an architect, or even as a “BIM-enabled” contractor managing projects on site. My aims are didactic. I am using my “BIM pencil” to describe the process of building a simple house using traditional craft methods, in a southern African context.

So let’s back-track to the setting-out process that precedes digging foundation trenches. I made a family for “old-school” wooden profiles. These are used in conjunction with tight lines, (string or nylon fishing line) to mark out the position of the foundation trenches and of the faces of the walls that will be built in those trenches. Because the profiles are placed well outside the line of the excavations, it’s possible to dig the trenches without disturbing this setting out.

The normal rule of thumb is to have a foundation trench three times as wide as the wall. This will spread the load. In a modern setting you would pour a strip of concrete into this trench and level it off with a heavy straitedge. I rural Zimbabwe it’s common to use a large rocks bedded in mortar. Then you stretch the lines around using the nail that marks the face of the wall, and plumb down from the line to mark the positions of the corners. Basically that involves laying a thin layer of mortar and scribing two lines with the point of your bricklaying trowel.
I made a Revit family to represent this using the ability of polylines to stretch parametrically while maintaining a wavy outline. I could have just made It a fixed size, but where’s the fun in that?

So now, with several phases set up in the model I can show the sequence of activities involved from a variety of different viewpoints and arrange these onto sheets. This is all “work in progress” but you get the idea of where I’m heading.

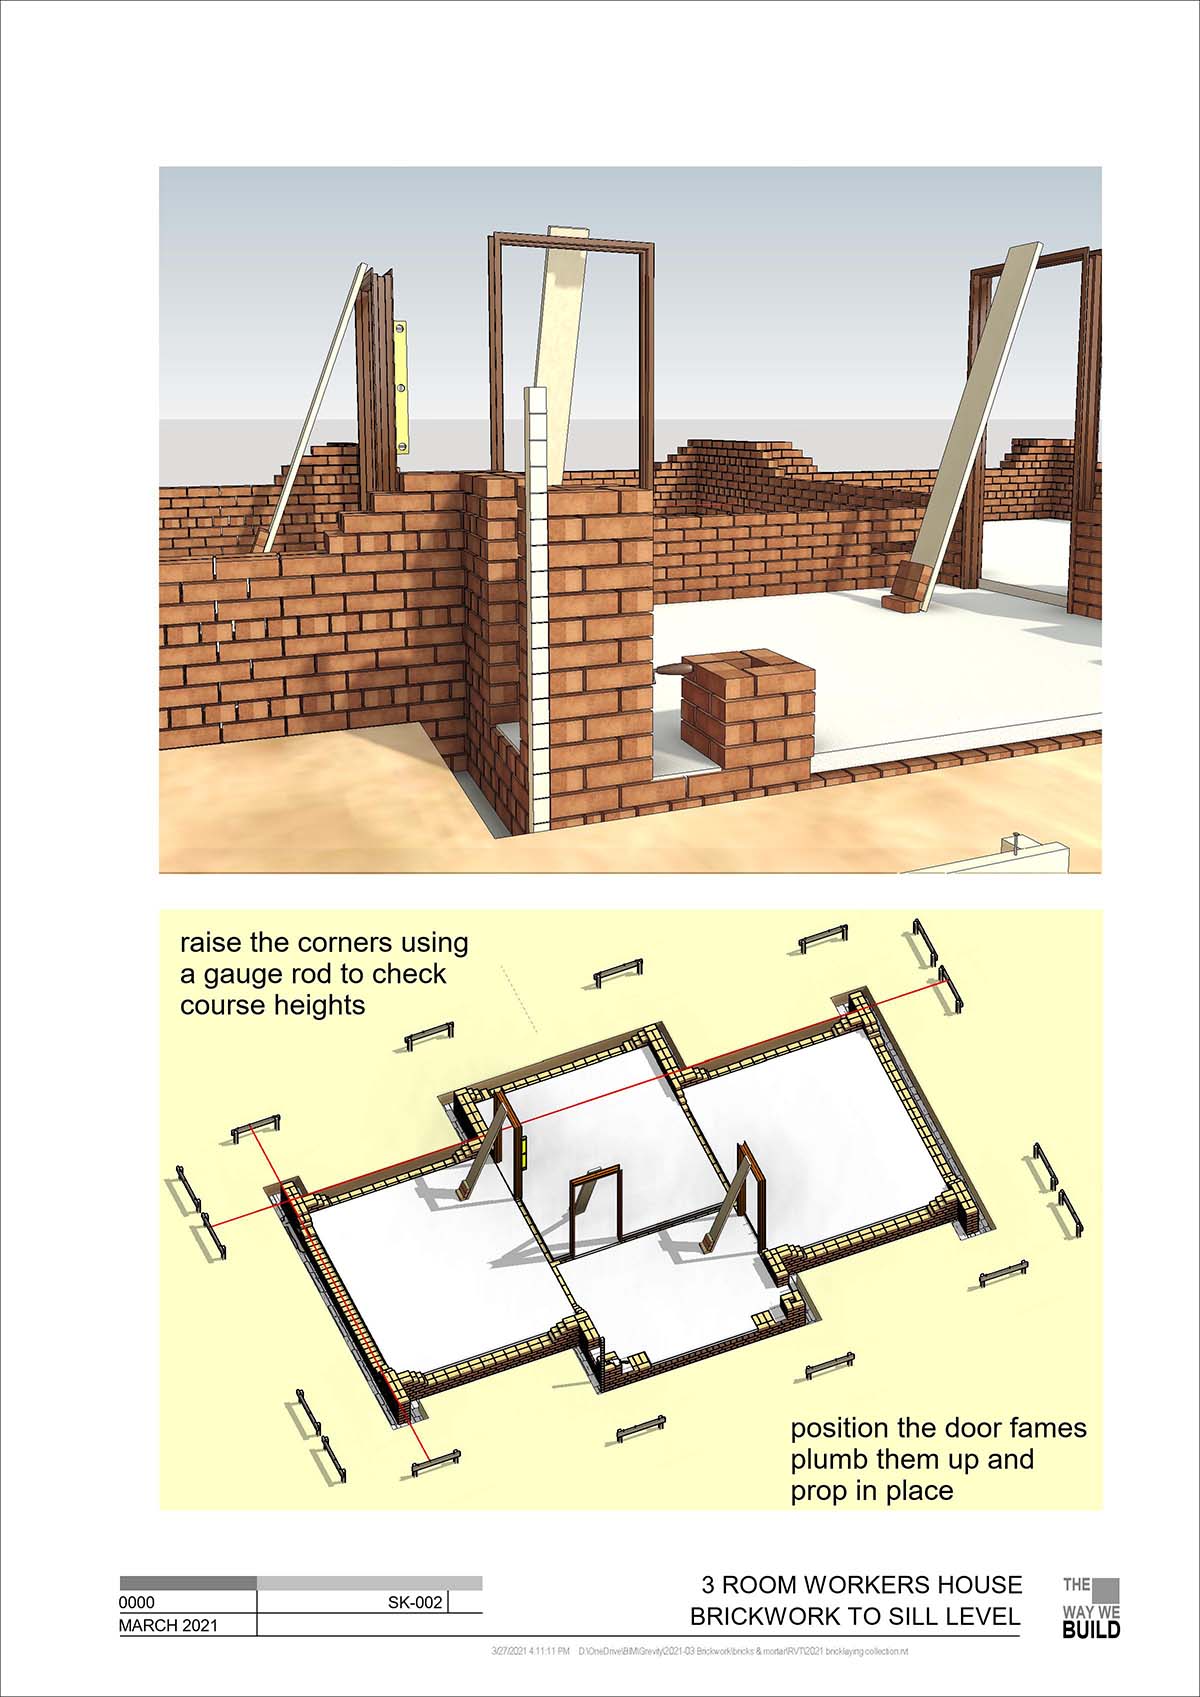
I’m going to skip forward again to the setting out of door frames. We will look at basic bricklaying techniques in another post (corners first, setting out your materials, running in to a line, trowel technique etc)
By the way I set out my house above ground level when I started on this work, and “dug the trenches afterwards.” This is a classic mistake. The brickwork on each side of the doorways looked correct, but I didn’t take care to check out the continuity. Later I found that I had kicked off with a full brick when it should have been a half.
It’s interesting to me that a digital model throws up some of the same kind of dilemmas as real life. I guess that’s the whole point of BIM really. “Measure twice, cut once” translates as “model twice, build once”
I did a study of steel windows about seven years ago. At that stage I didn’t fully integrate the hinges and casement stays into the frame family, so it was time to give these families an upgrade. I wouldn’t normally model the fittings when creating a window family, but for this educational exercise I think it adds a touch or realism.
We used to lay a couple of bricks-on-edge with a sand bed to support the window frame will building the lugs into the brick courses. Then it was easy enough to remove these at a later stage and run a course of sill bricks, or tiles, or whatever the detail was.

I made a comment on LinkedIn last week in relation to the model of Notre Dame that Autodesk have been showing on social media. It looks like a pretty good model, but I was a bit disappointed to see an article extolling the use of BIM where all the visuals are rendered camera views. One of the great things about a programme like Revit is the choice of view styles that it offers. Conventional plan and section views extremely powerful and I always try to interleave the real-time renders from Enscape3d with annotated orthographic views. There’s so much rich information in a BIM model if you think carefully about how to present it all to your audience.

Interesting Andy
ReplyDeleteMy name is is Machiveyi Zim
ReplyDeleteReally enjoyed this post. It's fascinating to see the history behind these reclaimed bricks and how much heritage can be preserved through reclamation. The photos and detailed background information make it a great resource for anyone interested in traditional brickwork.
ReplyDeleteFor those starting a career in the trade, learning about historic bricks alongside practical skills gained through an NVQ Level 3 in Bricklaying can provide a much deeper understanding of the craft. It's always inspiring to see how brickmaking and bricklaying have evolved over the years.